- Difficulty: Advanced
- Total Time: 2 hours
- Serves: 12
Ingredients
Shells
- 1 Egg white (room temperature or warmer)
- 2 tablespoons Granulated sugar
- ¼ cup Finely ground almond flour
- ½ cup Powdered sugar (Not packed)
- 1 drop Gel-based food dye (Optional)
Lavender-Lemon Filling
½ cup Unsalted butter (Softened) ½ cup Powdered sugar ½ teaspoon Food grade dried lavender flowers ¼ cup Lemon curd
Instructions
Shells
Measure your almond flour and pour it through a sifter. Do not force the large pieces through. After sifting your almond flour, remeasure it and sift more until you have 1/4 cup. Next, sift your powdered sugar. Be sure not to pack it as you measure it or your batter will be too dry. Whisk the flour and sugar together in the bowl.
Allow your egg to sit out or run it under warm water until it reaches room temperature or warmer. Crack it into a small bowl and separate the yolk. Do not allow any yolk, shell, or water to end up in your egg white. If this happens, discard your egg and start over.
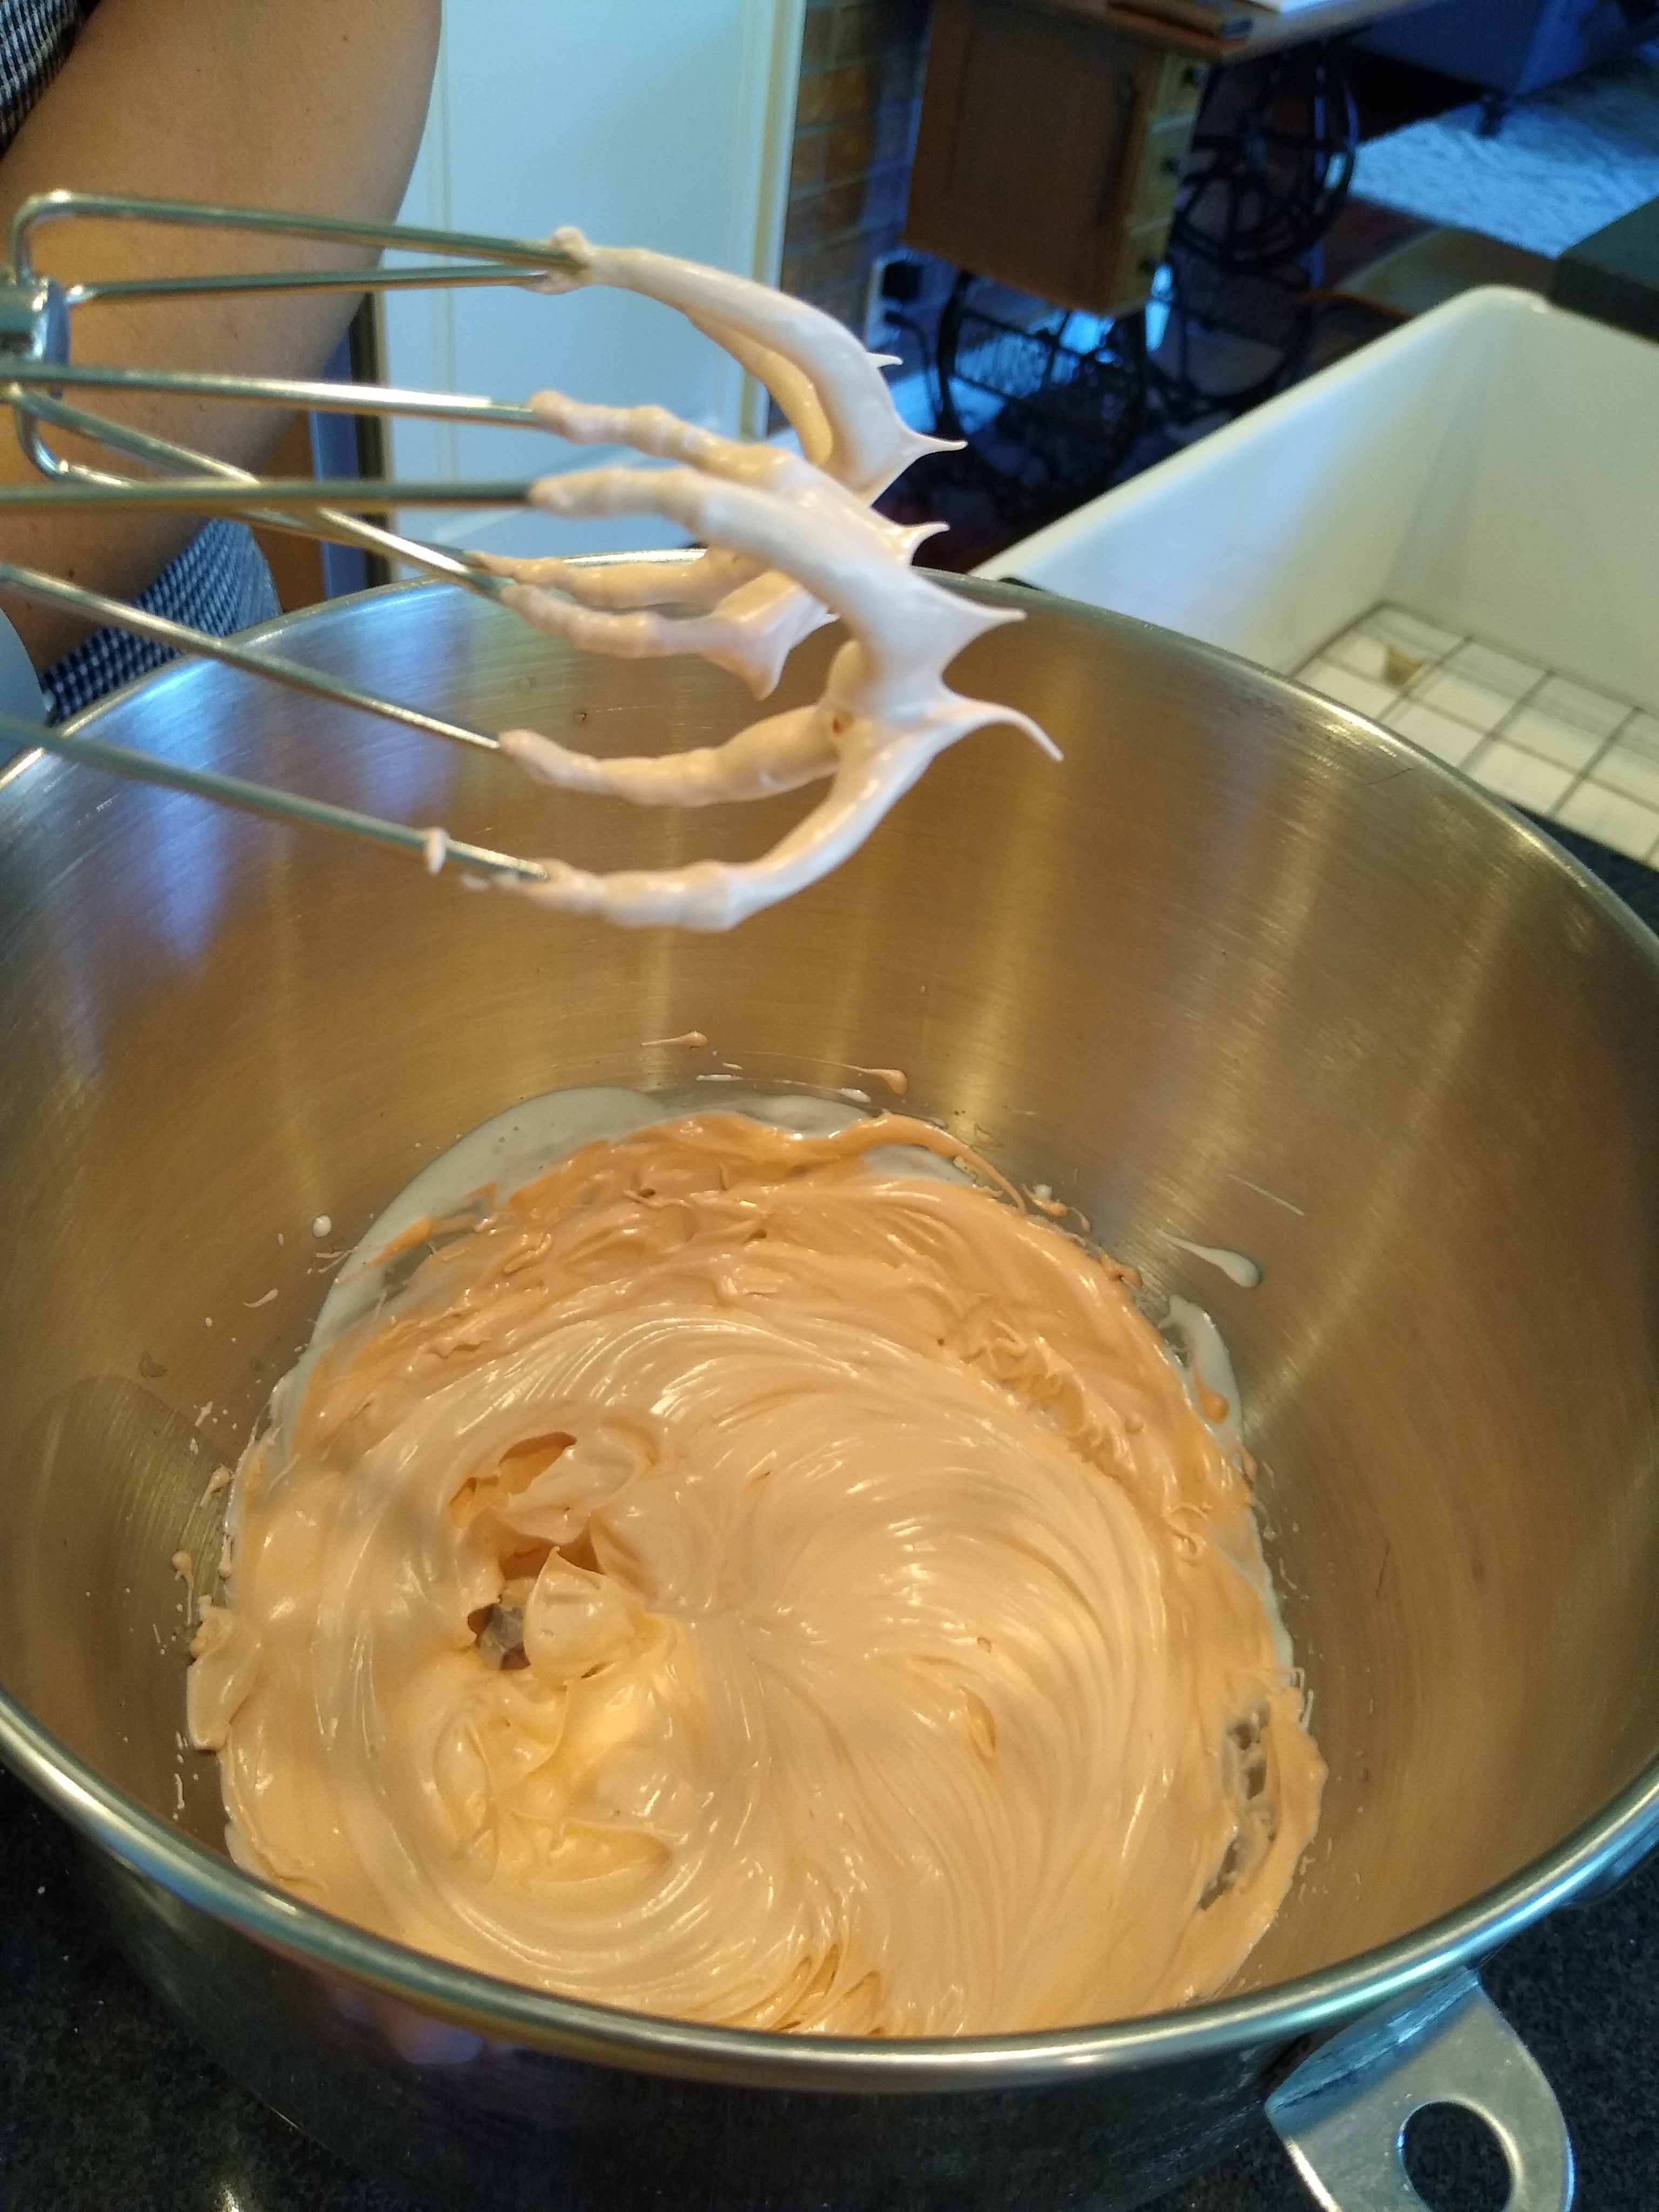
Pour the warm egg white into a stand mixer and beat with a whisk attachment on high until frothy. Add the granulated sugar one third at a time, beating on high in between. Once all of the sugar is added, continue beating until the meringue reaches the medium stiff peaks stage. Add a gel-based food dye to your liking at this point and continue beating.
Beat the meringue on high until just past stiff peaks. You will know it’s ready when 1) the meringue has a glossy sheen, 2) The peaks don’t fall when you lift the whisk, 3) the peaks are slightly lumpy, and 4) you can hold the bowl upside down and no meringue falls out.
If when you pull the beaters out of the meringue, it doesn’t pull peaks up with it but rather just takes a chunk out of the mass of meringue in the bowl, you have beaten it too much. You might still be able to make it work, but it is likely that your macarons will turn out hollow and crisp.
Add half of the flour mixture to the meringue and delicately fold it into the meringue until incorporated using a rubber spatula or scraper. Repeat with the other half of the flour mixture. Be gentle, as you want to preserve the integrity of the meringue, but be sure not to leave any loose crumbs.
Once the flour mixture is completely incorporated into the meringue, begin spreading the batter up and around the sides of the bowl, smashing out any air bubbles. Scrape the batter off of the sides of the bowl and repeat until the batter reaches the correct consistency.
You will know the batter is the right consistency when 1) the batter flows off the your spatula in one continues stream rather than falling off in lumps, 2) you can use this stream of batter to form several continuous figure 8 shapes, and 3) those figure 8 shapes slowly sink back into the rest of the batter over about 10 seconds.
Prepare a piping bag with a #10 or #12 piping tip. Line a half sheet with either parchment paper, using dabs of batter in the corners to stick it to the pan, or a silicone baking mat. I find that a pan with thick, tall walls works best.
Fill your piping bag with batter, gently scraping the sides to get as much as you can. Holding the piping bag straight up and down above one point, apply even pressure to squeeze out batter until you have a circle about 1 inch in diameter. Do not move the piping bag to make a circle; allow the batter to flow naturally into the shape. Repeat this process, piping each circle about 1 inch apart from the others, until you run out of batter.
Pick up the baking sheet by the edges and drop it onto the counter several times. This is loud and obnoxious, but it gets rid of the pesky air bubbles. If there are some stubborn air bubbles that just won’t pop, try using a skewer or a toothpick.
At this point, the macaron batter should look like neat little domed circles. Here are some things that may have gone wrong if they don’t look like that:
If the batter spread out a lot, it was likely too wet. To fix this, try the following:
- measure your egg before removing the yolk. It should be about 1/4 cup. If it is more than that, use a spoon to remove egg whites until it reaches 1/4 cup, being careful not to pop the yolk. Then separate the yolk and continue as normal.
- make sure your meringue is the right consistency. If you beat it too long or not long enough, the macaron shells can go 20 different flavors of weird.
If the macaron batter circles have little nibs in the centers, then it is likely that the batter was not macaronaged enough. Never fear, however, as this can be fixed with a little bit of luck and a LOT of speed. Quickly scrape the batter circles off of the pan and back into the bowl. Macaronage the batter just a bit more and re-test the consistency. Make sure the pan is cleaned off and then re-pipe the batter circles.
Leave the pan of batter circles on your counter for 15-45 minutes to develop a skin. If you don’t do this, they are liable to forego the foot-forming process during baking and the inner batter will spill out the sides, making a nasty mess of crispy macaron sadness on your pan. This would be a good time to preheat your oven to 300° Fahrenheit.
After the appropriate waiting period, gently touch the side of one of the shells. If it feels dry to the touch and the top looks matte rather than shiny, you are good to go!
Bake at 300° F for 12-15 minutes. Remove the pan from the oven and allow it to cool completely before removing the macaron shells.
Proceed to fill and decorate as you wish!
Note: Every oven bakes just a little bit differently. You may have to try a few batches to figure out exactly how long to bake them for. If they stick to the pan even after cooling completely, add 30 seconds or so each time until they don’t. If they are turning brown on the top or coming out crispy, take 30 seconds or so off until you find the perfect balance with your oven. I bake mine for 13 minutes and 30 seconds in my oven.
Lavender-Lemon Filling
Whip the softened butter and then add the powdered sugar, mixing gently at first. Continue mixing until completely smooth. Add the lavender buds and mix until evenly incorporated.
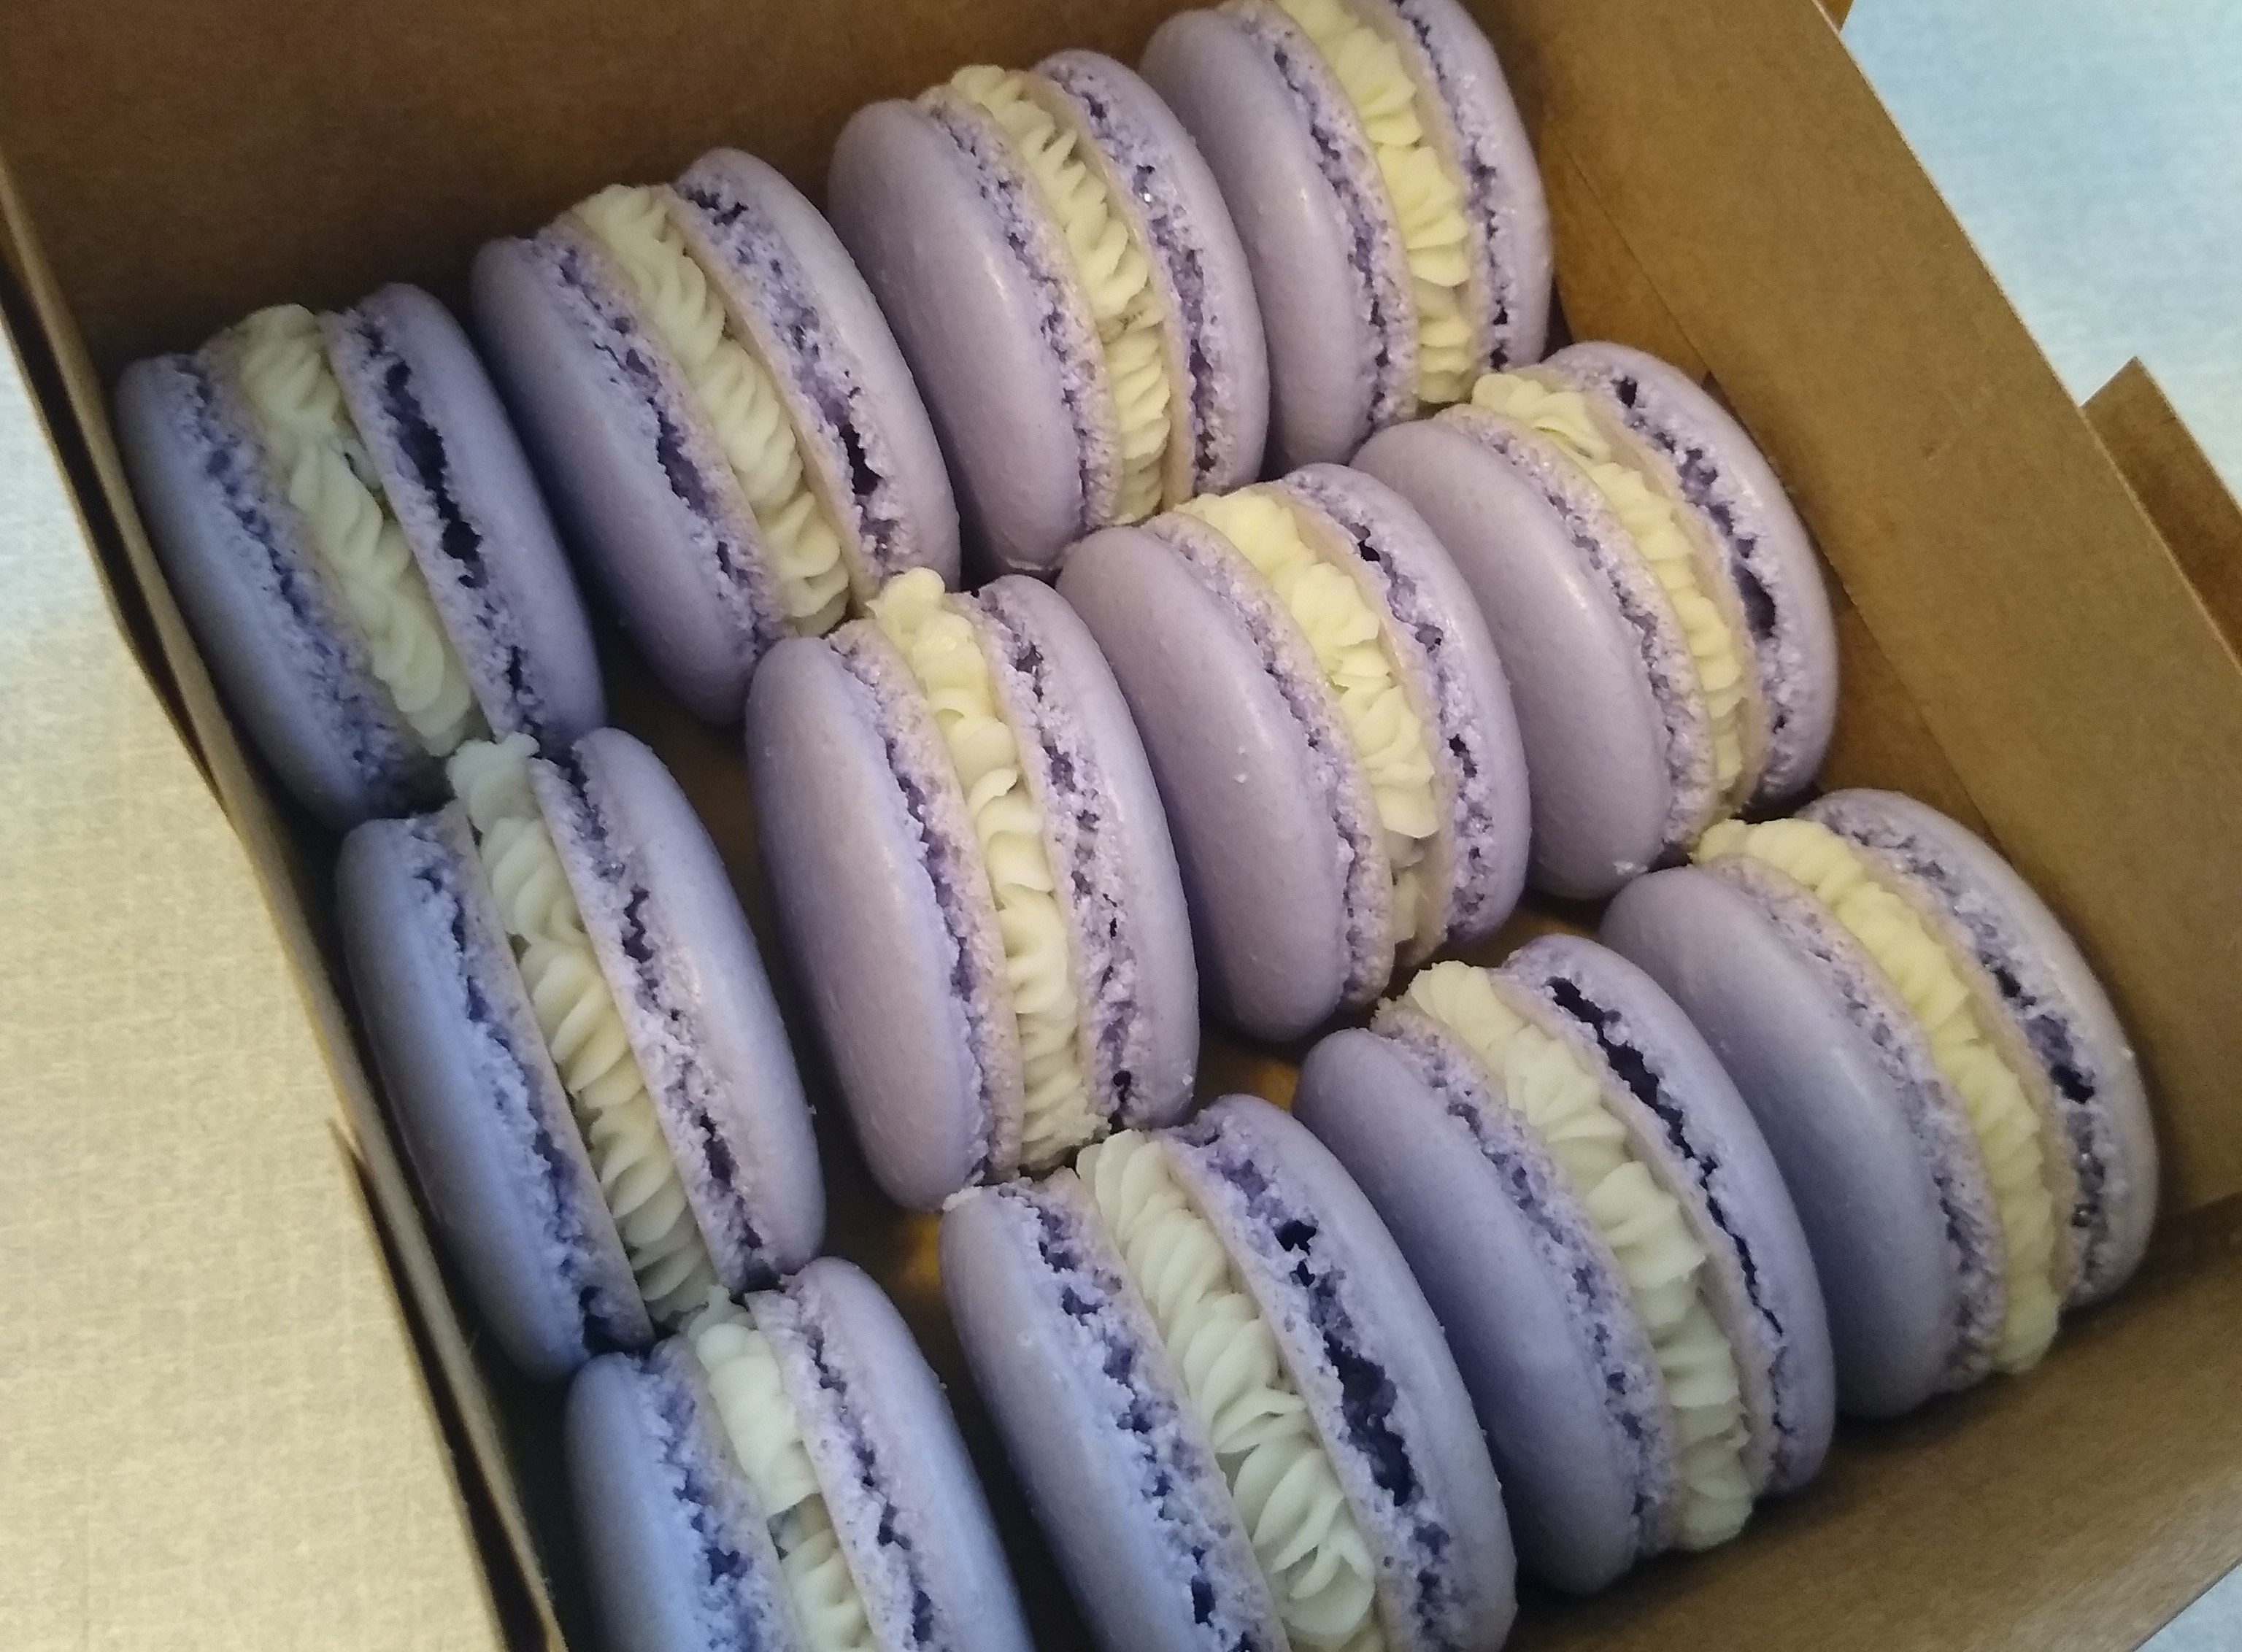
Match up the macaron shells, each with the once closest to it’s size.
Prepare a piping bag with a tip of your choice. Round and star tips tend to work best. Add the buttercream to the piping bag. Pipe the lavender buttercream around the edges of one shell from each pair, forming a ring of frosting.
Prepare a piping bag, with or without a tip, though round is best if you choose to use one. Add the lemon curd to the bag. Pipe the curd onto the shells with the lavender buttercream, filling in the center of the frosting ring.
Put the matched shells together by holding them on the sides and gently pressing the filled shell to the empty shell. Add a decorative drizzle or leave them as they are.
I know how tempted you’ll be to dig right into these delectable goodies, but I promise the wait is worth it. Package them up and put them in a safe place in your fridge for 12-24 hours before serving. A 24 hour maturation period is really what makes these. During this time, the flavors blend ever so slightly, the shells soften inside and crisp outside, and the overall texture develops.
Our Thoughts
When I first started my gluten free journey in March, 2021, I was at a loss. How on earth was I going to live my life without gluten? I’m a baker, for crying out loud!
In fact, I’ve been a baker since I was very young. I’ve always loved making cakes and cookies and breads. And I’ve always been good at it, too. That is, until I had to try it gluten free. After my somewhat earth-shattering Celiac Disease diagnosis, I felt like the only thing that would cheer me up would be trying out some recipes. So of course, the first thing I try was bread. It flopped. Hard.
Weeks of cookies, hamburger buns, more bread, and cakes later, I had minimal successes and a lot of wasted time and ingredients. I was feeling down, to say the least. But I decided I had to keep trying different things because, eventually, something had to work! …Right?
My first real victory came with an unexpected recipe: French Macarons. Yeah, you know the ones. Notoriously difficult to get right and crazy expensive because of it? That’s them!
My amazing baker/dietician aunt paid me a visit to help me figure out my new diet and, in the same trip, taught me how to make French Macarons. Now, I’ll be honest, the first attempt was a good and solid failure. They looked like melted Shrek or something like that. After a few tries, though, I had it down.
Mastering the infamous French Macaron is what gave me the confidence (and frankly, cockiness) I needed to continue pursuing Gluten Free baking and all of its crazy nuances. I definitely still have the occasional flop, but I’m learning more and more every day.
Here’s a few things you need to know about macarons before you start baking:
- They are NOT pronounced macarooooooooooon. Macaroons are little coconut cookies that I’m sure are delicious but they are nowhere near as difficult to pull off as these bad boys. Macarons are pronounced Mack-uh-rone. Please, it’s a pet peeve of mine.
- You probably won’t get it right on your first try and that’s okay. These things have the reputation they do for a reason; they are freaking hard. Keep trying, and always feel free to ask questions in the comments.
- Do not, and I repeat, DO NOT use a water or an alcohol based flavoring or food dye in the shells. Do what you will with your fillings, but water and alcohol both with ruin the meringue and cause your shells to fail. I’ve had it work out a couple times, but I’m honestly convinced those were freak accidents.
- Mix it up! Try a different flavor next time. I have flavors from Sour Patch Watermelon to Dark Chocolate Sea Salt Caramel. Don’t be afraid to try something new.
- Yes, you can make these vegan. No, I don’t know how. Yes, I am working on it. If I ever actually manage to pull it off, you all will be the first ones to know.
Most important of all, don’t be afraid. I didn’t come out of the womb knowing how to make perfect, elegant macarons and now I won’t stop bragging about mine! It takes time. You, too, can conquer the French Macaron.
Quick side note: A big thank you to my awesome mother in law, Erin Taylor, for making macarons with me and letting me take pictures as we went for this post!